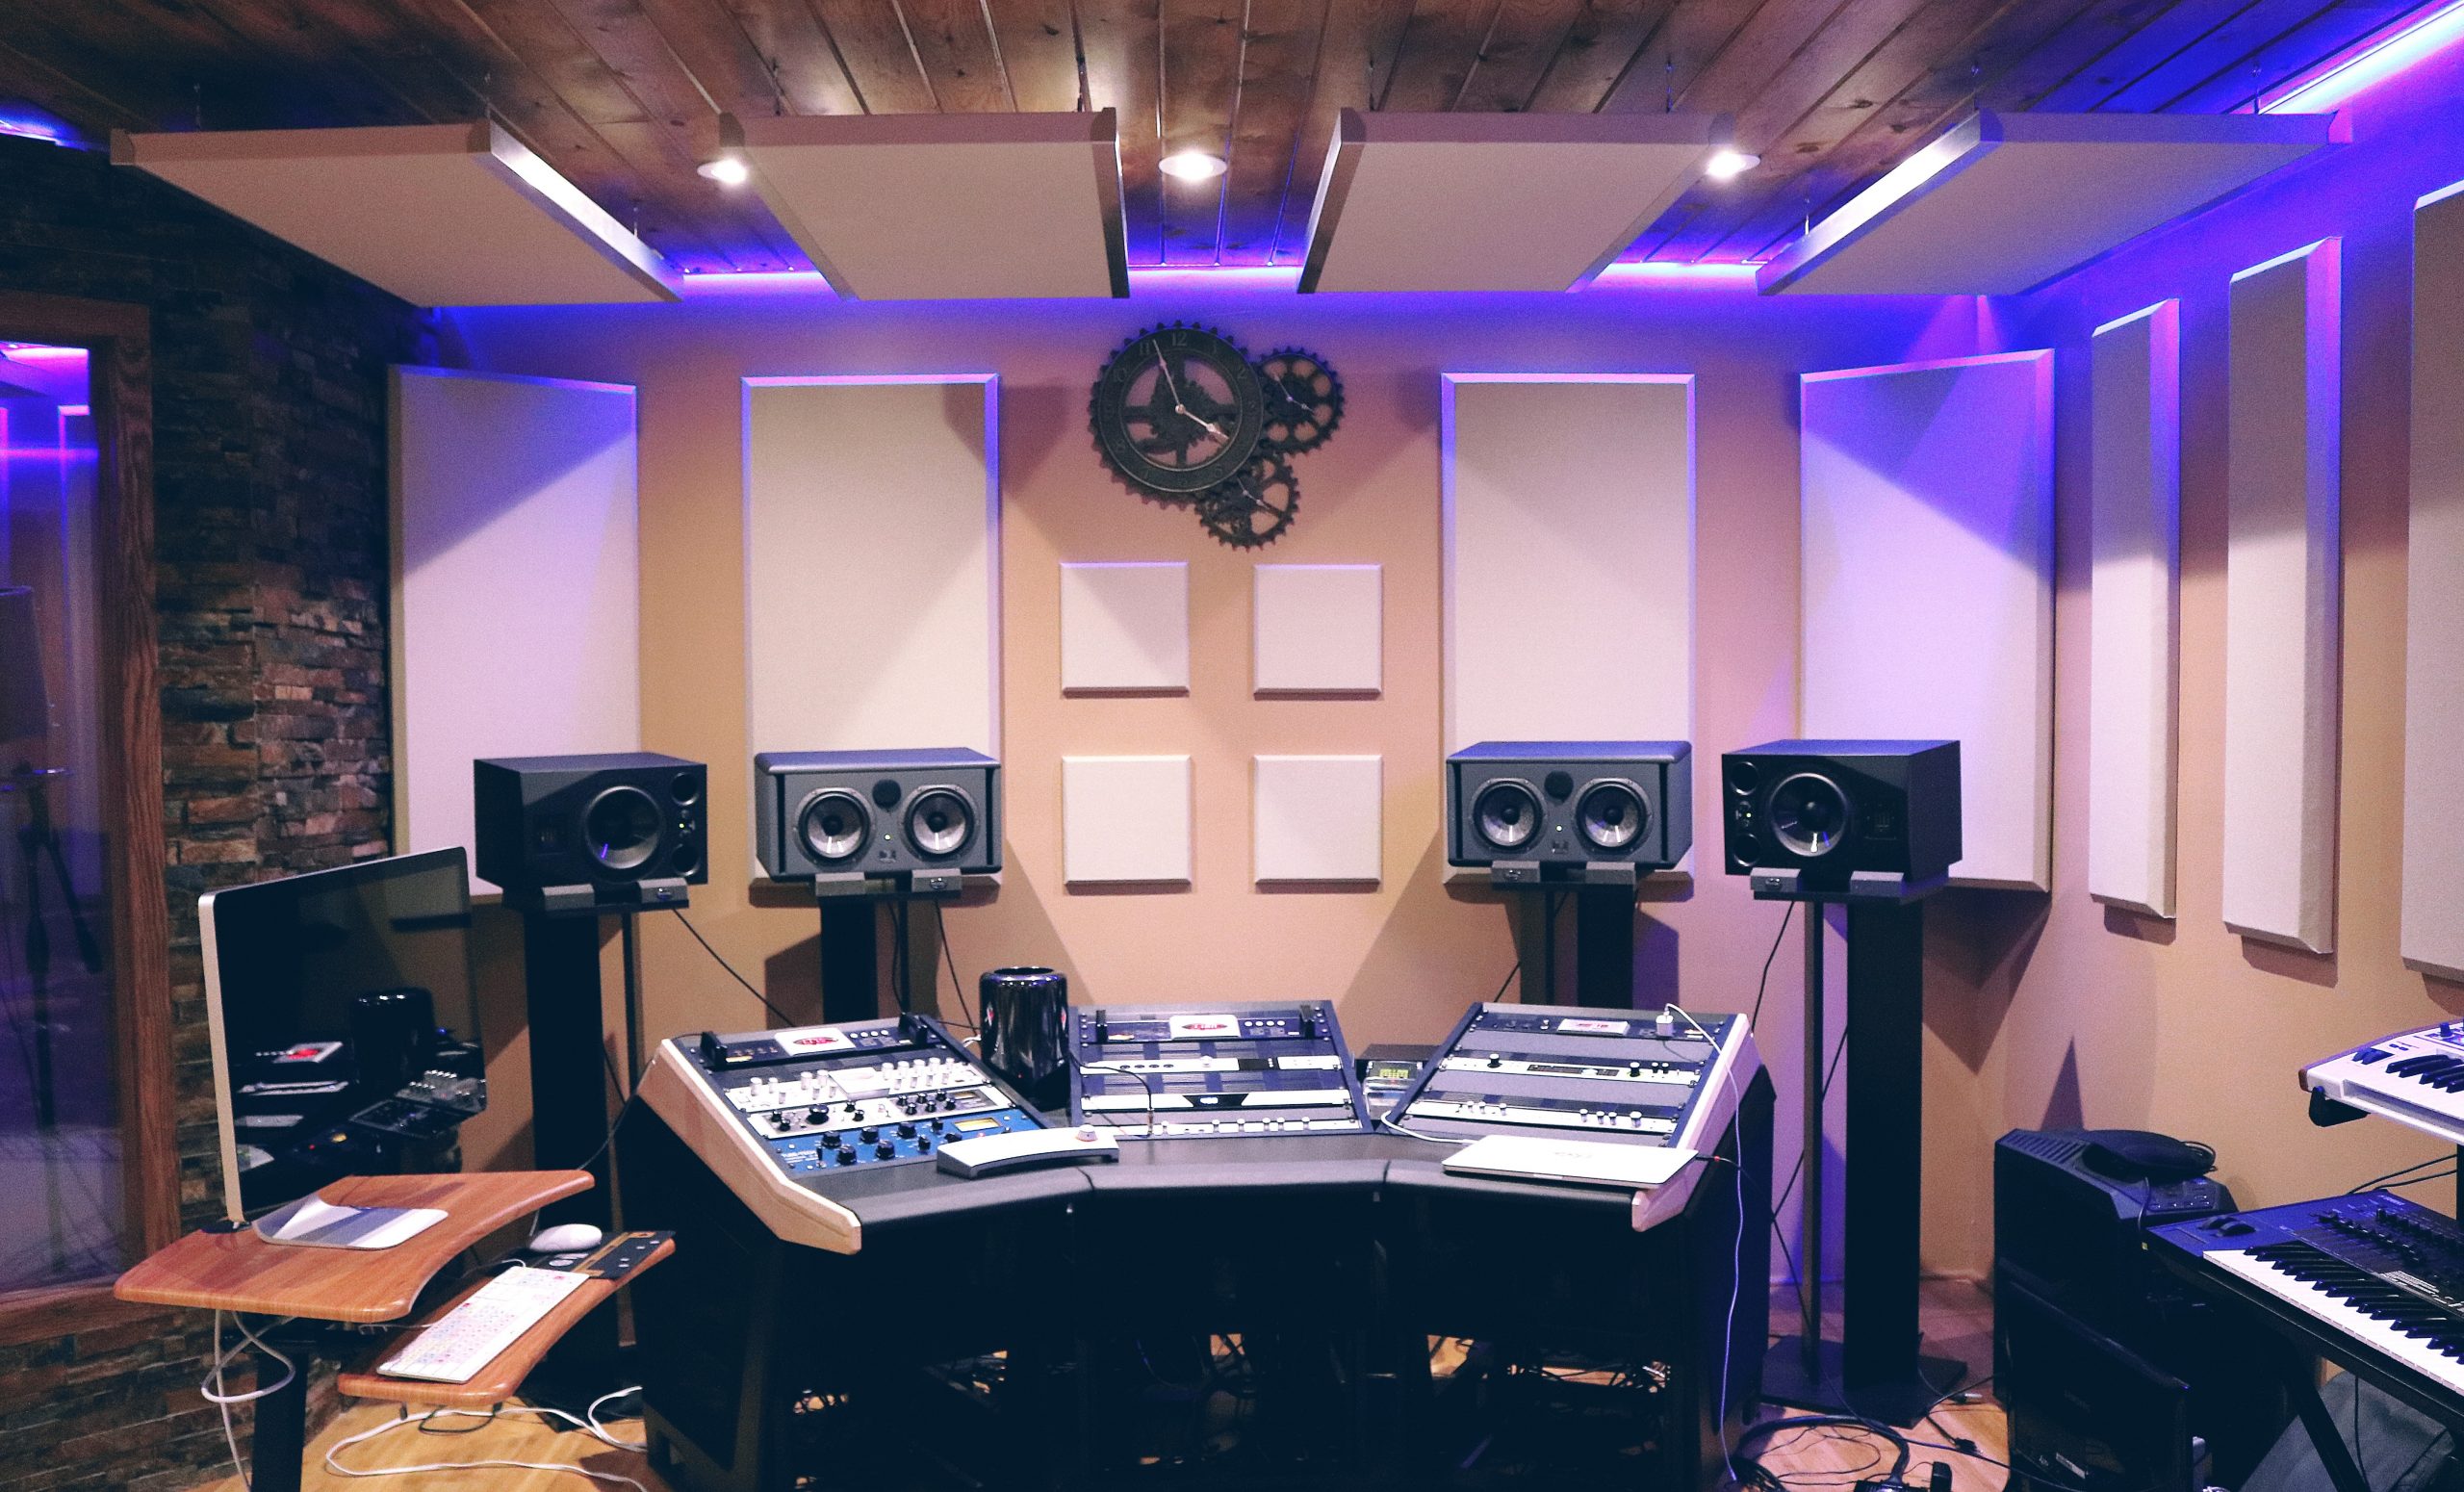
In this comprehensive guide, we will take you on a journey through the essential components of setting up a home music studio. Whether you’re an aspiring artist, a budding producer, or simply someone who wants to enjoy the pleasures of music creation at home, this blog is designed to provide you with the knowledge and guidance you need.
In recent years, there has been a remarkable shift in the world of music production.
What was once a privilege reserved for recording studios and professional musicians has now become accessible to anyone with a passion for music.
The rise of home music studios has transformed the way artists, producers, and hobbyists create and produce music.
Whether you’re a seasoned pro or just starting your musical journey, the idea of crafting your unique sound in the comfort of your home is now well within reach.
We’ll delve into the must-have hardware and software, explore the importance of acoustic treatment, introduce you to essential music accessories, and offer budget-friendly options.
Additionally, we’ll discuss the importance of monitoring and calibration and share tips for maintenance and care.
By the end of this guide, you’ll be well-equipped to embark on your own musical odyssey within the walls of your home studio. Let’s get started!
What Equipment Do You Need for a Home Music Studio?
To set up a home music studio, you’ll need essential equipment such as a computer, audio interface, studio monitors, microphones, and headphones. Acoustic treatment, digital audio workstation (DAW) software, and cables are also crucial for professional-quality music production.
Top 10: Home Music Studio Equipment
- Computer: A powerful computer with enough processing power and RAM to run digital audio workstations (DAWs) and software instruments. Best PCs for music production 2023: Apple Macs and desktop computers for your home studio | MusicRadar
- Audio Interface: An interface for connecting microphones and instruments to your computer and converting analogue audio to digital. The 20 best audio interfaces for home studios (2023) – Blog | Splice
- Studio Monitors: High-quality speakers for accurate sound monitoring and mixing. The 16 Best Studio Monitors for 2023 | Gear4music
- Headphones: Closed-back headphones for precise monitoring and tracking in isolation. The 7 Best Studio Headphones For Mixing And Recording – Summer 2023: Reviews – RTINGS.com
- Microphones: A versatile selection of microphones for recording vocals, instruments, and sound effects. The 15 Best Home Studio Mics in 2023 [Any Budget] – Produce Like A Pro
- Mic Stands and Pop Filters: Stands for holding microphones and pop filters to reduce plosives during vocal recording.
- Digital Audio Workstation (DAW) Software: Software for recording, editing, and mixing your music. The Best Digital Audio Workstations (DAWs) for 2023 (pcmag.com)
- Acoustic Treatment: Panels, diffusers, and bass traps to control room acoustics.
- MIDI Controller: A keyboard or pad controller for creating and playing virtual instruments.
- Cables and Connectivity: High-quality audio and MIDI cables, as well as adapters, to connect your gear effectively.
The Rise of Home Music Studios
Gone are the days when musicians needed to book expensive recording studio time to bring their creative visions to life.
The digital age has ushered in an era where the power to produce high-quality music is at your fingertips.
With the advent of increasingly affordable and advanced music equipment and software, artists now have the means to establish their very own home music studios.
This transformation has democratized music production, allowing for greater creativity and experimentation.
Importance of Having the Right Equipment for Your Home Studio
While the rise of home music studios has opened up incredible opportunities, it’s crucial to recognize the significance of having the right equipment.
Your choice of gear can make or break your musical endeavours.
From capturing pristine audio to fine-tuning your compositions, each piece of equipment plays a vital role in achieving the sound you envision.
Inadequate or mismatched gear can result in frustrating limitations and subpar recordings. Therefore, investing in the right tools is essential for unlocking your full musical potential.
Essential Hardware
Creating a home music studio that produces professional-grade music begins with the right hardware.
These foundational components serve as the backbone of your setup, and each one plays a pivotal role in capturing, processing, and shaping your music.
Computer
Your choice of computer is paramount in your home studio setup. It’s the central hub where all your music production and recording tasks will take place. When selecting a computer, consider the following:
- Performance: Opt for a computer with ample processing power (CPU) and RAM to handle the demands of modern digital audio workstations (DAWs) and plugins.
- Storage: Large, fast storage options (SSD recommended) are essential for storing audio files and project data.
- Compatibility: Ensure your chosen computer is compatible with your preferred DAW and audio interface.
- Operating System: Mac and Windows are the most popular choices, with each having its advantages and software compatibility.
Audio Interface
An audio interface is the bridge between your instruments or microphones and your computer. It’s a crucial piece of hardware for achieving high-quality audio recordings.
When selecting an audio interface, consider:
- Input/Output Options: Choose an interface with the right number of inputs and outputs for your needs. Inputs are for microphones and instruments, while outputs connect to your studio monitors or headphones.
- Audio Quality: Look for an interface with high-resolution audio converters for pristine sound quality.
- Preamps: Good-quality preamps are essential for recording instruments and vocals with clarity.
- Connectivity: Ensure it’s compatible with your computer (USB, Thunderbolt, or other connections).
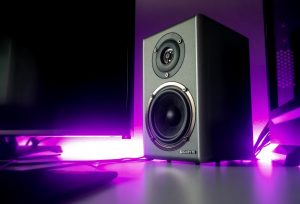
Studio Monitors
Studio monitors, or speakers, are designed to provide accurate and uncoloured sound reproduction. They are essential for mixing and monitoring your music.
Consider these factors when choosing studio monitors:
- Nearfield vs. Midfield: Nearfield monitors are suitable for small rooms and close listening, while midfield monitors are ideal for larger spaces.
- Frequency Response: Check the frequency response to ensure it covers the full audio spectrum.
- Room Acoustics: Consider your room’s acoustics and invest in acoustic treatment to minimize reflections.
- Bi-amping: Some monitors offer separate amplifiers for the tweeter and woofer, providing better sound control.

Headphones
Headphones are essential for precise monitoring and tracking, especially in situations where you can’t use studio monitors or need to isolate sound.
Here’s what to look for in studio headphones:
- Closed-Back vs. Open-Back: Closed-back headphones provide isolation and are suitable for tracking, while open-back headphones offer a more natural sound but less isolation.
- Frequency Response: Look for headphones with a balanced frequency response for accurate audio representation.
- Comfort: Comfortable headphones are crucial for long recording or mixing sessions.
- Impedance: Ensure the impedance matches your audio interface’s capabilities.
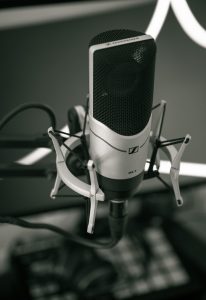
Microphones
Microphones are your primary tools for capturing sound. The choice of microphone depends on your recording needs:
- Condenser vs. Dynamic: Condenser mics are versatile for studio vocals and instruments, while dynamic mics are durable and great for live sound and high-SPL (sound pressure level) sources.
- Polar Patterns: Consider the microphone’s polar pattern (e.g., cardioid, omnidirectional) based on the source you’re recording.
- Diaphragm Size: Large-diaphragm condensers are common for vocals, while small-diaphragm condensers are versatile for instruments.
- Microphone Placement: Proper placement is crucial for capturing the best sound; use mic stands and pop filters to aid in this process.

Mic Stands and Pop Filters
Mic stands and pop filters are often overlooked but essential accessories for achieving professional-quality recordings:
- Mic Stands: Sturdy and adjustable mic stands help position microphones correctly and reduce handling noise.
- Pop Filters: These minimize plosive sounds (popping) in vocal recordings, resulting in cleaner audio.
Investing in high-quality hardware for your home music studio is a significant step toward creating music that sounds polished and professional.
These foundational elements ensure you have the tools needed to capture and manipulate sound effectively.
Software and Digital Tools for Your Home Music Studio
While hardware is the backbone of your home music studio, the software and digital tools you choose are the creative engine that drives your music production.
Let’s explore the essential software components of a successful home studio setup.
Digital Audio Workstation (DAW)
A Digital Audio Workstation is the heart of your music production setup. It’s where you record, edit, arrange, and mix your music. When selecting a DAW, consider the following:
- User Interface: Choose a DAW with an interface that suits your workflow and preferences.
- Compatibility: Ensure it’s compatible with your computer’s operating system.
- Feature Set: Look for features like MIDI sequencing, audio recording, virtual instruments, and audio effects.
- Third-Party Plugin Support: Check if it supports third-party virtual instruments and plugins.
- Learning Curve: Consider your level of experience; some DAWs are more beginner-friendly than others.
- Price: DAWs range from free to premium; choose one that fits your budget and needs.
Virtual Instruments and Plugins
Virtual instruments and plugins expand your creative possibilities by adding sounds and effects to your DAW. Here’s what to consider:
- Instrument Libraries: Look for virtual instruments that cover a wide range of sounds, from pianos and synthesizers to orchestral and ethnic instruments.
- Effect Plugins: Consider essential effects like EQ, compression, reverb, and delay, as well as creative plugins for unique sound manipulation.
- Quality vs. Quantity: Prioritize quality over quantity when selecting plugins; having a few versatile plugins can often be more valuable than a vast collection.
- Compatibility: Ensure that the virtual instruments and plugins you choose are compatible with your DAW.
Audio Recording and Editing Software
In addition to your DAW, you may need specialized audio recording and editing software for specific tasks:
- Audio Editors: Software like Adobe Audition or Audacity can be handy for detailed audio editing tasks.
- Audio Clean-up Tools: Consider noise reduction and restoration plugins for improving audio quality.
- Synchronization Tools: Tools for aligning audio to video, if you’re working on multimedia projects.
Music Production Software
Music production software complements your DAW by offering tools for specific tasks:
- Virtual Drum Machines: These are great for creating drum tracks and beats.
- Sampler Instruments: Useful for manipulating and arranging samples.
- Scorewriters: If you compose sheet music, scorewriters can be invaluable.
Acoustic Treatment
Creating a pristine acoustic environment within your home music studio is often an overlooked but crucial aspect of achieving professional sound quality.
Proper acoustic treatment can make the difference between a space that sounds amateurish and one that’s ready for top-tier music production.
Let’s delve into the essentials of acoustic treatment.
Importance of Acoustic Treatment
Acoustic treatment is vital because it controls the way sound behaves within a room.
Without proper treatment, sound waves bounce off walls, ceilings, and floors, creating unwanted reflections, resonances, and echoes. The result is an inaccurate listening environment that can lead to mixing and recording mistakes.
Here’s why acoustic treatment matters:
- Accuracy: Acoustic treatment ensures that what you hear is an accurate representation of your music, free from distortions caused by room acoustics.
- Noise Control: It helps in reducing noise leakage into or out of your studio, creating a quieter recording space.
- Improved Mixing: Accurate sound reproduction facilitates better mixing decisions, leading to professional-quality recordings.
Absorption vs. Diffusion
Acoustic treatment primarily falls into two categories: absorption and diffusion.
- Absorption: Absorption materials, such as foam panels and bass traps, soak up sound energy. They are used to reduce reflections, echoes, and standing waves in your room. Absorption panels are especially useful for controlling mid and high-frequency sound waves.
- Diffusion: Diffusion scatters sound in various directions, reducing the build-up of sound energy in specific spots. Diffusers are typically used to maintain a sense of spaciousness in a room while minimizing flutter echoes and excessive absorption.
The choice between absorption and diffusion depends on your studio’s unique acoustic characteristics and your goals for sound control. A balanced combination of both is often ideal.
Bass Traps and Panels
Low-frequency sound waves, or bass, can be particularly challenging to control. This is where bass traps and panels come into play:
- Bass Traps: These are designed to absorb low-frequency sound waves that tend to accumulate in corners and along walls. Placing bass traps in these areas helps prevent “boomy” or uneven bass response in your recordings and mixes.
- Panels: Acoustic panels can be strategically positioned on walls and ceilings to absorb mid and high-frequency sound reflections. They are effective in reducing overall room reverb and echo.
Acoustic Foams
Acoustic foam panels are perhaps the most recognized form of acoustic treatment. They are widely used for their effectiveness in controlling sound reflections and absorption in the mid to high-frequency range.
Here’s what to consider:
- Placement: Position foam panels at early reflection points—spots where sound first hits the walls or ceiling—to minimize direct reflections.
- Thickness and Density: The thickness and density of foam panels affect their absorption capabilities. Thicker and denser foam is more effective at absorbing sound.
In summary, acoustic treatment is a critical step in creating a professional-quality home music studio.
It ensures that your room’s acoustics complement your musical endeavours, allowing you to make accurate recording, mixing, and mastering decisions.
By addressing absorption, diffusion, and low-frequency control, you can transform your studio space into an acoustically optimized haven for musical creativity.
Music Accessories for Your Home Music Studio
Equipping your home music studio with the right accessories can greatly enhance your creative process and workflow.
These accessories can help you control your instruments and gear, improve connectivity, and ensure everything runs smoothly.
MIDI Controllers
MIDI controllers are versatile devices that allow you to interact with your virtual instruments and DAW in a tactile way. They come in various forms:
- MIDI Keyboards: These are keyboard controllers that let you play virtual pianos, synths, and other instruments. They often include knobs, sliders, and pads for additional control.
- MIDI Pad Controllers: Designed for triggering drum sounds and samples, these controllers are ideal for beat production and percussion.
- MIDI Control Surfaces: Larger control surfaces mimic mixing boards, providing physical faders, knobs, and buttons for hands-on control of your DAW’s mixer and effects.
- MIDI Wind Controllers and More: Specialized controllers like wind controllers, breath controllers, and guitar MIDI controllers cater to specific playing styles.
MIDI controllers bring a tactile element to your music production, making it easier to record expressive performances and automate parameters.
Keyboard and Synthesizers
Keyboards and synthesizers are essential for creating melodies, harmonies, and chord progressions. Here’s what to consider:
- MIDI Keyboards: In addition to their MIDI controller functionality, some MIDI keyboards have built-in sounds, making them standalone instruments.
- Synthesizers: Hardware synthesizers come in various forms, from analogue to digital, offering a wide range of sonic possibilities.
- Workstation Keyboards: These combine MIDI control, synthesizer sounds, and often recording capabilities in one unit.
- Controller Keyboards: Slim and portable keyboards are excellent for space-conscious setups.
The choice between MIDI keyboards and synthesizers depends on your musical style and preferences. Some musicians opt for a combination of both to have the best of both worlds.
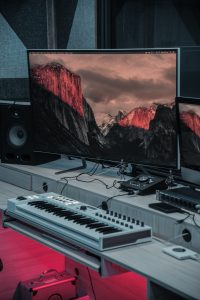

Control Surfaces
Control surfaces are dedicated devices that streamline your interaction with your DAW, especially during mixing and automation tasks. Consider:
- Mixer Control Surfaces: These mimic the layout of an audio mixer and offer physical faders, knobs, and buttons for adjusting track levels and effects.
- DAW Controllers: Generic DAW controllers provide transport controls, jog wheels, and assignable knobs for controlling various DAW functions.
- Custom Control Surfaces: Some DAWs support custom control surface configurations, allowing you to create a setup tailored to your specific needs.
Control surfaces can significantly improve your mixing and editing efficiency, reducing the reliance on your computer mouse and keyboard.
Cables and Connectivity
The importance of cables and connectivity should not be underestimated in a home music studio:
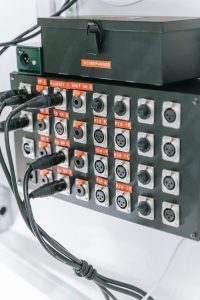
- Audio Cables: High-quality audio cables (XLR, TRS, and TS) ensure clean signal transmission between your gear.
- MIDI Cables: Reliable MIDI cables connect your MIDI controllers and instruments to your interface or other MIDI-equipped devices.
- USB and FireWire Cables: These are essential for connecting your gear to your computer.
- Patch Cables: For modular synthesizers and effects units, patch cables are indispensable for routing and modulation.
Invest in durable, well-made cables to avoid signal loss and interference. Proper cable management also contributes to a neat and efficient studio setup.
By carefully selecting and integrating these music accessories into your home studio, you can enhance your creative capabilities, streamline your workflow, and ensure that your studio setup is both functional and reliable.
Ergonomic Studio Furniture for Your Home Music Studio
Creating a comfortable and efficient workspace in your home music studio is essential for long hours of creativity and production.
Ergonomic studio furniture not only enhances your comfort but also contributes to a more organized and productive environment. Let’s explore the key elements of studio furniture:
Studio Desk
A well-designed studio desk is the centrepiece of your studio furniture, providing a dedicated workspace for your equipment and creativity. Consider these factors when choosing a studio desk:
- Size and Layout: Ensure the desk can accommodate all your equipment and provides enough workspace for your needs.
- Height and Ergonomics: Adjustable desks can help you find the perfect height for comfortable and fatigue-free work.
- Rack Space: If you use outboard gear, look for desks with rack space or integrated rack mounts.
- Cable Management: Built-in cable management solutions keep your workspace tidy and prevent cable clutter.
Studio Chair
A comfortable and ergonomic studio chair is crucial for long recording and mixing sessions. When selecting a studio chair:
- Ergonomics: Look for chairs with lumbar support, adjustable height, and armrests to reduce fatigue and strain.
- Padding and Comfort: A well-padded seat and breathable materials contribute to comfort during extended use.
- Mobility: Consider chairs with wheels for easy movement within your studio space.
- Durability: Invest in a chair built to withstand the demands of your studio environment.
Cable Management Solutions
Effective cable management is often underestimated but is essential for maintaining a clean and organized studio environment:
- Cable Trays and Racks: Install cable trays under your desk to route and secure cables. Rack-mounted cable organizers can keep your gear’s cables tidy.
- Velcro Straps and Cable Ties: Use Velcro straps and cable ties to bundle and label cables, making them easier to identify and manage.
- Cable Channels and Clips: Adhesive cable channels and clips can keep cables attached to surfaces and prevent them from tangling.
- Labelling: Labelling cables at both ends ensures quick identification, reducing the risk of accidental disconnections.
Ergonomic studio furniture, including desks and chairs, plays a significant role in your overall studio experience.
These pieces of furniture enhance your comfort, promote proper posture, and contribute to a clutter-free and efficient workspace.
When combined with effective cable management solutions, they create an environment where you can focus on your music without distractions or discomfort.
Importance of Monitoring and Calibration
Monitoring your audio accurately is vital in a home music studio. Without precise monitoring, you risk making mix decisions based on flawed information, which can lead to less-than-optimal results.
In this chapter, we’ll explore the critical aspects of monitoring and calibration.
Speaker Calibration
Speaker calibration involves ensuring that your studio monitors reproduce sound as accurately as possible. Here’s why it matters:
- Accurate Mixing: Calibrated speakers help you make informed mixing decisions, ensuring that your music sounds good on various playback systems.
- Consistency: Calibration ensures that your monitoring remains consistent over time, even as your studio environment changes.
- Reduced Fatigue: Calibrated speakers reduce listening fatigue, allowing you to work longer and with greater precision.
Acoustic Measurement Tools
Acoustic measurement tools are essential for understanding and improving your studio’s sound environment. Here are some key tools to consider:
- Measurement Microphones: Specialized measurement microphones are designed for capturing room acoustics and speaker responses. They provide data to identify problematic frequencies and room resonances.
- Room Analysis Software: Room analysis software, such as Room EQ Wizard (REW), helps you measure and visualize your room’s acoustics. It provides valuable data for treatment decisions.
- SPL Meters: Sound Pressure Level (SPL) meters help you measure and control the sound pressure in your room, ensuring safe listening levels and accurate monitoring.
- RTA (Real-Time Analyzer): RTA software or hardware tools display the frequency response of your room and monitor setup in real-time, helping you identify problem areas.
- Acoustic Measurement Systems: Some hardware and software solutions combine various measurement tools into comprehensive systems, simplifying the calibration and analysis process.
Acoustic measurement tools empower you to identify and address acoustic issues within your studio, whether it’s addressing standing waves, optimizing speaker placement, or implementing acoustic treatment.
By incorporating speaker calibration and acoustic measurement tools into your home music studio, you ensure that your monitoring environment is accurate and reliable.
This, in turn, allows you to make informed mixing decisions, create music that translates well to different playback systems, and ultimately produce professional-quality tracks.
Recording and Production Accessories
In the quest for producing professional-quality music in your home studio, certain accessories can make a significant difference.
This chapter explores essential recording and production accessories that contribute to the quality and precision of your recordings.
Pop Shields
Pop shields, also known as pop filters or windshields, are simple yet indispensable accessories for recording vocals and certain instruments. Here’s why they are crucial:
- Reducing Plosives: Pop shields mitigate the explosive “p” and “b” sounds that can cause unwanted bursts of air hitting the microphone, resulting in distortion.
- Improving Clarity: By reducing plosives, pop shields help maintain clear and clean vocal recordings.
- Prolonging Microphone Life: They also protect your microphone from moisture, reducing the risk of damage over time.
Pop shields are usually placed between the vocalist/instrument and the microphone, creating a barrier that diffuses the airflow before it reaches the mic diaphragm.
This simple accessory significantly enhances the quality of vocal and instrumental recordings.
Isolation Booths
Isolation booths are ideal for achieving pristine recordings in environments with high noise levels or for isolating specific instruments. Here’s why they are valuable:
- Noise Isolation: Isolation booths effectively block out external sounds, ensuring that your recordings are free from unwanted background noise.
- Reduced Room Ambience: They minimize the impact of room acoustics on your recordings, providing a more controlled sound.
- Versatility: Isolation booths can be used for vocals, guitar amps, drums, and any sound source that benefits from isolation.
While dedicated isolation booths are ideal, you can also create DIY isolation solutions using portable vocal booths or vocal shields to enhance recording quality in less-than-optimal acoustic environments.
Instrument and Vocal Tuners
Accurate tuning is fundamental to creating music that sounds harmonious and professional. Instrument and vocal tuners play a critical role in this process:
- Instrument Tuners: Electronic tuners help ensure that your instruments, such as guitars, basses, and keyboards, are perfectly tuned. Clip-on tuners and pedal tuners are popular options.
- Vocal Tuners: Vocal tuning software, often used in post-production, can correct pitch imperfections in vocal recordings, resulting in pitch-perfect performances.
- Digital Tuners: Digital tuners for instruments display real-time tuning information, making it easy to achieve precise tuning.
Keeping your instruments and vocals in tune is essential for creating music that is musically pleasing and free from dissonance.
These recording and production accessories may seem relatively small in comparison to the rest of your studio setup, but their impact on the quality and professionalism of your recordings should not be underestimated.
Pop shields, isolation booths, and tuners all contribute to the precision, clarity, and overall excellence of your musical creations.
Budget-Friendly Options for Your Home Music Studio
Building a home music studio doesn’t have to break the bank. In this chapter, we’ll explore cost-effective alternatives and DIY solutions that allow you to create a functional studio on a budget.
Cost-effective Alternatives
- Free DAWs: Instead of investing in premium digital audio workstations (DAWs), consider using free options like Audacity, Cakewalk by BandLab, or Tracktion T7. These DAWs offer powerful features without the price tag.
- Entry-Level Studio Monitors: While high-end studio monitors can be expensive, there are affordable options from reputable brands that provide decent sound quality. Look for budget-friendly nearfield monitors that suit your studio size.
- USB Microphones: USB microphones are an excellent choice for those on a budget. They eliminate the need for an audio interface and provide a simple way to record vocals and instruments with decent quality.
- Freeware Plugins: Many free audio plugins and virtual instruments are available online. You can find everything from EQs and compressors to synths and drum machines without spending a dime.
- Used Gear: Explore the used market for audio equipment. You can often find gently used studio gear, including microphones, interfaces, and instruments, at a fraction of the original cost.
DIY Solutions
- Acoustic Treatment: Create your own acoustic treatment panels using affordable materials like fiberglass insulation, wooden frames, and fabric. There are numerous online tutorials and guides to help you build effective absorbers and diffusers.
- Homemade Pop Filter: Craft a pop filter using a wire coat hanger, pantyhose, and a hoop. This DIY solution can effectively reduce plosives in vocal recordings.
- DIY Studio Furniture: Build your studio desk and equipment stands using readily available materials like plywood and metal brackets. Customizing your furniture can save you money and ensure a perfect fit for your space.
- Homemade Vocal Booth: If you need isolation for vocals, consider creating a DIY vocal booth using PVC pipes and moving blankets. This cost-effective solution can provide decent sound isolation.
- Cable Management: Organize your cables using inexpensive cable ties, adhesive clips, and cable sleeves. These DIY cable management solutions can keep your studio tidy without spending much.
- Homemade Diffusers: Craft DIY diffusers using wood, foam, or cardboard. These can help scatter sound reflections in your studio and improve acoustics.
By exploring these budget-friendly alternatives and DIY solutions, you can significantly reduce the initial investment required for your home music studio while still achieving decent sound quality and functionality.
With a bit of creativity and resourcefulness, you can build a studio that suits your needs without breaking your budget.
Maintenance and Care
Taking proper care of your equipment is essential to ensure its longevity and maintain the quality of your recordings.
In this chapter, we’ll explore key maintenance and protection strategies for your home music studio.
Cleaning and Maintenance Tips
- Dust Control: Dust can accumulate on your gear and affect its performance. Regularly dust off your equipment using a soft, lint-free cloth or a can of compressed air. Pay extra attention to vents and control knobs.
- Cleaning Microphones: Keep microphone diaphragms clean by using a small, soft brush to remove dust and debris. Use a gentle microfiber cloth to wipe the body of the microphone. Be cautious not to touch the diaphragm with your fingers.
- Cleaning Studio Monitors: Use a soft, damp cloth to clean the speaker cones and cabinet of your studio monitors. Avoid abrasive cleaners or excessive moisture, as they can damage the speakers.
- Keyboard and Synth Maintenance: For keyboard instruments, regularly clean the keys with a damp cloth. Protect them from spills, and consider using a dust cover when not in use.
- Cable Maintenance: Inspect your cables for wear and tear regularly. Replace damaged or frayed cables to prevent signal loss and noise issues.
- Computer Maintenance: Keep your computer clean and free from dust. Ensure proper ventilation to prevent overheating. Regularly update and back up your data to avoid unexpected data loss.

Protecting Your Equipment
- Use Cases and Covers: Invest in protective cases and covers for your instruments and gear, especially if you transport them frequently. These cases shield your equipment from physical damage, dust, and moisture.
- Power Conditioning: Consider using a power conditioner or surge protector to protect your gear from power surges and electrical noise. This helps prevent damage to sensitive electronic components.
- Temperature and Humidity Control: Maintain a stable environment with controlled temperature and humidity levels. Extreme conditions can damage electronics and instruments.
- Instrument Stands: Use sturdy instrument stands to keep your guitars, basses, and other stringed instruments off the floor and safe from accidental damage.
- Microphone Storage: Store microphones in protective cases to prevent dust and damage. Use shock mounts to isolate them from vibrations during recording.
- Proper Cable Handling: Avoid excessive bending or twisting of cables, as this can damage internal wiring. Coil and store cables neatly when not in use to prevent kinks and tangles.
- Regular Inspections: Periodically inspect your equipment for loose screws, loose connectors, or any signs of wear. Address issues promptly to prevent further damage.
- Secure Studio: If you leave your studio unattended, consider installing locks or security systems to protect your gear from theft.
By following these cleaning, maintenance, and protection strategies, you can extend the lifespan of your equipment, maintain optimal performance, and ensure that your home music studio remains a productive and creative space for years to come.
Proper care and attention to detail will reward you with reliable gear and high-quality recordings.
Conclusion – Home Music Studio Equipment
Congratulations on embarking on the journey to create your own home music studio and discovering the essential equipment required!
Throughout this comprehensive guide, we’ve covered everything you need to know, from the essential equipment and software to acoustic treatment, accessories, and maintenance tips.
Whether you’re a seasoned musician or a budding producer, your home music studio is now well-equipped to unleash your creativity and produce professional-quality music.
Remember, building a home music studio is not just about the gear; it’s about the passion and dedication you bring to your craft.
It’s about the melodies, harmonies, and rhythms you create, the stories you tell through your music, and the emotions you evoke in your listeners.
Your home studio is a canvas waiting for your musical expressions. It’s a sanctuary where you can experiment, learn, and perfect your art.
As you embark on this exciting journey, never forget that the most important element in your studio is you—the artist, producer, and creator. Your unique perspective and voice are what make your music truly special.
So, go ahead, make the most of your home music studio, and let your creativity flow. Whether it’s crafting a catchy melody, recording a soulful vocal, or shaping the perfect mix, your studio is your creative playground.
Embrace the joy of making music, hone your skills, and share your creations with the world. Your home music studio is not just a physical space; it’s the place where your musical dreams come to life.
Now, with the knowledge and tools at your disposal, it’s time to turn up the volume, hit that record button, and let your music soar.
Enjoy the journey, and may your home music studio be the source of endless inspiration and musical magic.

