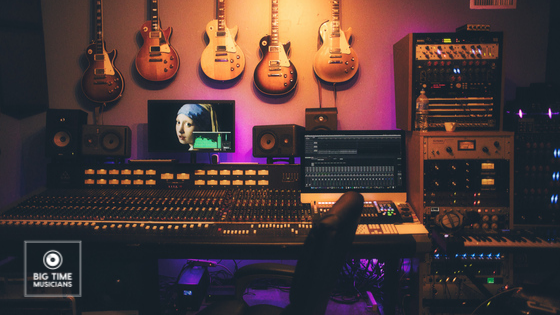
Starting your music studio at home can be quite overwhelming as a beginner. However, to save you this stress, we have gathered some of the essentials items you need to get your home studio working. We have also included a recommendation for some of the items on this list. This article is for beginners looking for tips on how to build a home music studio without breaking the bank.
Essential Items Needed For A Home Studio:
1.Computer
The first must-have item in your home studio is a computer. When starting, you do not necessarily need a new computer, a used computer that has at least 4 Gb of RAM, a 2.4 GHz quad-core processor, and 1 TB of HDD should be enough to handle basic music production sessions. You do not need to spend thousands of dollars to get yourself a high-end PC.
Also, you can get either a MAC or A PC when starting. The only catch is that it has to meet the requirements given.
2.DAW (Digital Audio Workstation)
The next essential item you need is a digital audio workstation. A digital audio workstation is a software application which you would use to edit, record, and process your audio files. It can be used to record tracks, arrange songs, mix songs, simply put, a DAW is where everything takes place.
As a beginner, we recommend you choose an affordable or a free option that gives you all the tools you need to produce some good music. Some of the ones we recommend include:
- Apple GarageBand: It is free, however, it is compatible with only MAC and iOS devices only.
- Ableton Live 11 Intro: Purchasing the Ableton Live 11 will cost $99, and it is compatible with both MAC and PC devices.
- Cockos Reaper 6: It cost $60, and it is compatible with Linux, Windows, and Mac devices.
- Akai MPC Beats: It is free, and it is compatible with Mac and PC.
- Acoustica Mixcraft 9 Recording Studio: It cost $99, and it is only compatible with PCs.
Again, we highly recommend that you start with these free and cheap options first, before purchasing an expensive option. Purchasing it will help you understand how mixing and music production works.
That being said, if you have the money to spend and you’re looking for a premium DAW, then we recommend Pro Tools. Pro Tools is an industry-standard DAW, and if you can navigate your way around Pro Tools, then you should be able to work on every major recording studio. Signing up for Pro Tools should cost you about $299 for a yearly subscription. We highly recommend Pro Tools to you if you are an inspiring sound engineer or producer.
3.Audio Interface
The next essential tool you will need for your home studio setup is an audio interface. An audio interface converts analog signals from your microphone and other instruments to digital signals for the computer to recognize and process. Generally, an audio interface allows you to connect your guitars, microphones, and synthesizers to a computer. So, because a computer doesn’t have the inputs needed for you to connect your mics and guitars directly, an audio interface provides you with those inputs interfaces to help you connect these devices to the computer. The audio interface then connects to the computer via a USB port or a thunderbolt.
There are tons of audio interfaces out there, however, here are a couple we recommend:
- Focusrite Scarlett Solo: $119
- PreSonus Studio 24c: $159.95
- Audient iD4: $286
- M-Audio AIR 1962: $156.95
When choosing among these audio interfaces, you want to make sure that you choose them based on the number and type of inputs they offer. Ensure that the number and type of audio they offer are what you will need to do your music.
4.Microphone
Microphones are a must-have there are numerous microphones out there, and choosing the best microphone for your home setup is preferential. However, you want to ensure that the microphone you pick best complements your studio needs and the vocalist. You do not need to get a new microphone if you have a usable one around.
That been said, microphones can be categorized into either condenser and dynamic microphones. Here is a simple tip to help you choose between these two.
If you are looking to capture every detail in the vocalist’s voice (the highs, mids, and lows), then we recommend you go in for a condenser microphone. Condenser microphones are highly sensitive, which is why they capture every pitch in a voice. However, condenser microphones are expensive, and they need to be used in a treated room.
If your home studio setup isn’t going to be focused on voice, then a dynamic microphone might be a good option for you. These microphones are cheaper and they are loved for their proximity effect. The proximity effect means the closer you are to the microphone, the louder your bass will be. Dynamic microphones are a great choice for capturing loud sounds for example during live performances or for drum setups. Dynamic mics can also be used for podcasting.
When choosing a microphone, you will need to get some accessories to help you utilize your mic. Some of these accessories include:
- A mic stand
- A USB or XLR cable
- A pop filter: this will help filter any popping sounds created when one is singing or speaking through a microphone. It will also protect your condenser from any unnecessary noise.
- An acoustic shield: this keeps sounds in the might, and it prevents echoes and reverberations, ambiance, and noise.
5.MIDI Keyboard
Unlike regular keyboards, MIDI keyboards do not produce any sound. They have keys on them that enable you to control software instruments on your DAW. They allow you to control a large variety of instruments and allow you to incorporate instrumentation into songs. So, assuming you have a virtual keyboard on your DAW, instead of using your mouse or computer keyboard to control the virtual keyboard or drum, you can easily do that with a DAW.
Simply put, a MIDI controller allows you to manipulate all the sounds in your DAW.
Also, samplers only work when they are controlled with a midi. We highly recommend you purchase a midi because it takes up less size than a regular keyboard.
6.Studio Monitors and Headphones
When recording a song, you want to make sure that you have a way to listen to the sounds been produces. Well, getting quality headphones and speakers will help you listen to all the sounds you produce in your studio.
There are a couple of factors when choosing the right headphones, and here are a few things to consider:
- Open Back Vs Closed Back: Opened back headphones have earcups that are not completely covered and they do not completely isolate you from the outside world. These types of headphones sound more clear and natural, and you can use these headphones for long recording sessions. Closed-back headphones, on the other hand, have earcups that are completely covered. This causes closed-backs headphones to isolate you from the outside. Due to their closed nature, air does not pass through them causing moisture to build up when used for long hours. These types of headphones work well for tracking or recording in the studio.
- Circumaural Vs Supra-aural: Circumaural headphones completely block out any noise, while supra-aural do not completely block out any noise.
There are many more factors to consider when choosing great studio headphones, and this post should help you.
Unlike regular speakers, studio monitors are designed to give you a flat and accurate sound with little to no distortions rather than producing a good sound. So, you must choose the right studio monitors to produce the right sound. If you have no idea what type of studio monitor to choose, then this post would give you an insight into how to choose the right monitor.
That being said, here are our top 5 recommendations for studio monitors and headphones.
Studio Monitors:
- Yamaha HS8
- PreSonus Eris E3.5
- Pioneer DJ DM 40
- JBL LSR308
- Alesis Elevate 5
Best Studio Headphones:
- Sennheiser HD820
- Audio-Technica ATH-M50x
- Sony MDR-7506
- AKG K371
- AKG K240
Tips To Help You Setup A Home Studio:
1.Choosing The Right Room
Ensure that the room you choose as your studio is unevenly shaped. Because the more unevenly shaped your room is the better your recording experience is. Rooms with parallel walls or symmetrical rooms have a higher chance of accumulating standing waves. If you have a symmetrical room, you can still set up your studio, however, ensure that you have a way to eradicate standing waves.
2.Acoustic Treatment
If you have the money to spend, then we recommend that you purchase some acoustic treatments. Acoustic treatments help you produce a more natural, neutral, and pleasing sound in a controlled environment. This post should give you more information on acoustic treatments for home studios.
3.Choose The Right Placement For Your Monitor
For you to have the best sounds from your monitor, you want to ensure that you place them in an optimal position. Here are some tips to consider when placing your sound monitor:
- Place the front face of the monitor away from hard surfaces and place the front face towards you.
- Ensure that they are at ear level with you.
- Form an equilateral triangle with your head and the two monitors.


